NOTE: It is not necessary to disconnect the brake hose at the caliper. Support caliper, do not allow it to be suspended by the brake hose.
(4) Remove split pin, nut lock, nut, washer and re move bearings and disc assembly.
(5) Remove inner bearing oil seal and bearings. Clean bearings and hub with X55 or similar solvent.
(6) Inspect bearings for wear and damage.
(7) Repack bearings and hub with the specified grease, install bearings in hub and fit new inner bearing oil seal.
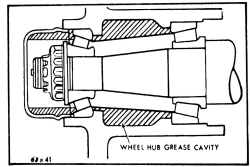
Fig. 3 I-Hub cavity (typical)
(8) Refit hub assembly to stub axle spindle. Adjust the front wheel bearing as previously outlined under "Front Wheel Bearing Adjustment."
(9) Refit caliper.
(10) Refit wheels in previously marked position, lower vehicle and tighten nuts in tWQ stages using a diagonal sequence.
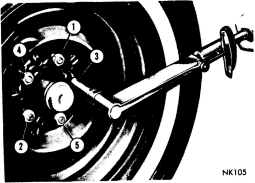
Fig. 32-Wheel nut torque sequence
1-2-18
Tyre Inspection
An inspection of tyres, together with information as to locality of vehicle operation will usually indicate abnor mal wear due to operating conditions such as mechanical faults, which should be corrected. Various types of ab- " normal tyre wear with their causes and corrective actions are shown in (Fig. 33).
Under inflation - For the maximum results in stabil ity and handling, ride quality and tyre life, tyre inflation pressures should not be allowed to go below the recom mended inflation pressures (indicated on tyre placard in glove compartment).
Under inflation results in much faster wear of the shoulders than the centre of tread.
Over inflation - By maintaining specified tyre inflation pressure (indicated on tyre placard in glove compart ment), even wear will take place over entire tread sur face. Over inflation causes faster wear at the centre of the tread and the possibility of cuts, punctures and fractures.
Cracked Tread - This is the result of alternate under and over inflation, exceeding the recommended full rated load, high temperature or high speed driving.
Excessive Camber Wear - Excessive wheel camber, either positive or negative causes the tyre to run at an angle to the road. One side of the tread wears more than the other. For best corrective results, adjust the front wheel camber to specifications and rotate tyres.
Toe-in or Toe-out Tread Wear - Excessive toe-in or toe-out causes wear on the edges of the front tyres, An excessive amount of either toe-in or toe-out actually drags the tyre instead of letting the tyre roll true. This wear condition will usually produce a tapered or feathered edge on the outside ribs. Adjust the toe-in to specifica tions.
Bald Spot or Scalloped Tread Wear - Scalloping and bald spotting of tyres is associated with unbalanced con ditions, weak or inoperative shock absorbers, worn sus pension and or continuous high speed operation.
Regardless of the cause of bald spotting or scalloped tread wear on either front tyre, no alignment, replace ment shock absorber or balance job can prevent future excessive wear of the spots if the tyre is not rotated to a different location. Once a front tyre acquires flat or seal lope? spots additional wear will continue at a rapid rate if left uncorrected.
To . correct this condition, tyre rotation as well as rec tification of the suspension fault and wheel balance are necessary. An unevenly worn tyre may partially true itself up on a rear wheel.
Tread Wear Indicators - Driving potential, cornering and braking traction decreases as tyres wear. As tread depth decreases the tyres have less resistance to road hazards and are more likely to hydroplane on wet road surfaces.
Tread wear indicators are provided to assist in deter mining when tyres should be replaced. These indicators are moulded into the bottom of the tread grooves and will appear as approximately 19 mm (i") wide bands when the tread depth has been reduce to replacement level.